When you set up a proxy server with a Wi-Fi network, an iPad or iPhone will use it to connect to it. This is occasionally necessary to browse the Internet on corporate or educational networks, and your internet traffic will go via the proxy you set up.
In most cases, you can use proxies if your institution or workplace provides one. You might use a proxy to conceal the IP address or browse geo-blocked sites not available in your region, but we recommend using a VPN instead. Get the appropriate credentials from your workplace or school and continue reading if you need to establish a proxy.
1. How to Configure a Proxy Server on an iPhone or iPad Step by Step
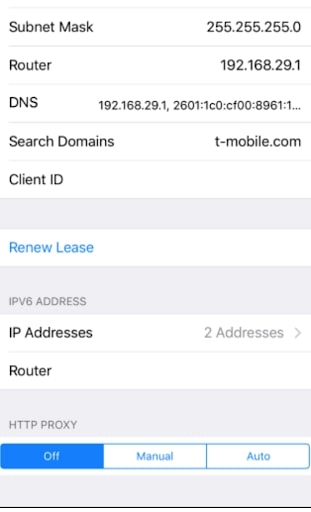
Step 1: To access proxy configurations on your iPhone or iPad, go to Settings > Wi-Fi. Select the title of the Wi-Fi connection to which you are currently connected. At the bottom of your screen, you’ll see the “HTTP Proxy” option if you scroll down.
HTTP Proxy setting
The HTTP Proxy setting is off by default. When connected to a network, your iPhone will not activate a proxy.
Step 2: Select “Auto” to allow automated proxy detection. The WPAD, or Web Proxy Auto-Discovery Protocol, is used by your iPhone to determine whether a proxy is required on the Wi-Fi network and establish your proxy configuration if one is required automatically. Corporate and educational networks often employ this feature. Even if you select “Auto,” your iPhone or iPad will not employ a proxy if your current connection does not give proxy information utilizing the WPAD protocol.
Step 3: Select “Auto” and enter the location of your proxy auto-configuration code into the “URL” box to utilize an automatic proxy configuration script, often known as a.PAC file. Instead of WPAD, iOS will utilize the proxy auto-configuration code to enable your proxy.
Enabling proxy
If your proxy service provider or network administrator prefers to utilize the proxy auto-configuration script, they will provide you with the file’s address.
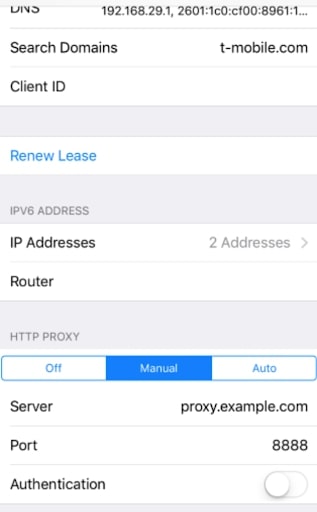
Step 4: Select “Manual” to manually provide a proxy server’s IP and port. In the “Server” box, provide the proxy server’s IP, and in the “Port” box, type the port it requires. Your corporation or proxy service provider will provide these details.
Manual proxy code
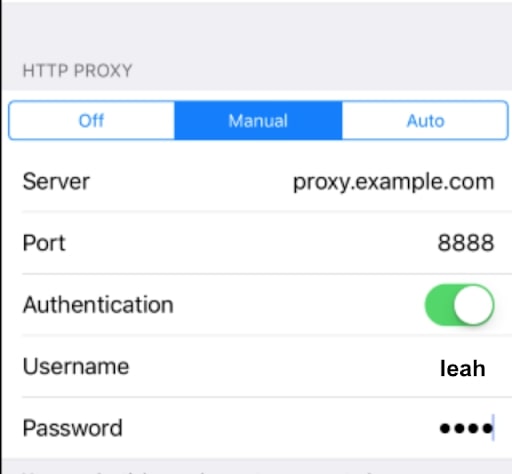
Enabling authentication
Step 5: Enable the “Authentication” option if the proxy server needs a login and password (your proxy provider will tell you if it does). In the “Login” and “Password” fields, type the login and password that the proxy server requires.
Error message
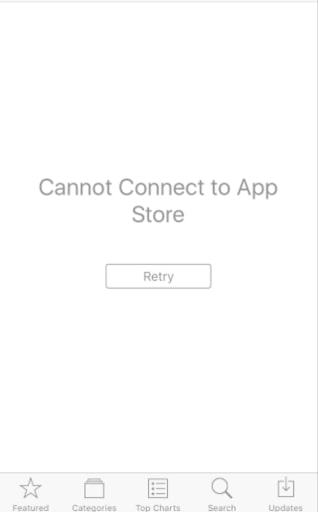
You won’t be able to view websites or other network addresses if your iPad or iPhone can’t connect to a proxy– for example, if the proxy system is down or if you input its data incorrectly. Before you may continue using that Wi-Fi network’s Internet, you’ll need to change your proxy settings.
2. Conclusion
Each Wi-Fi network has its proxy settings that you must establish. To put it another way, if you wish to use the exact proxy on three distinct Wi-Fi networks, you’ll have to configure it independently for each one, inputting the server information three times. You may need to utilize a proxy while connecting to your workplace’s Wi-Fi network, but not at household and on alternative Wi-Fi networks.
You’ll need to “supervise” your iPad and iPhone and build a configuration setting that allows a proxy on all connections if you want to establish a global HTTP proxy that works across all Wi-Fi networks. Because Apple considers this a function for corporations, schools, and other organizations, enterprise-grade setup tools are required. We hope this guide on configuring a proxy server on your iPad or iPhone can help you.
Marcus is a cybersecurity analyst with a focus on VPN and proxy services. As the founder and driving force behind a prominent VPN and proxy website, Private Proxy Guide, Marcus has emerged as a trusted authority in the digital realm. With a passion for staying ahead of evolving cyber threats, he has played a pivotal role in educating and empowering individuals and businesses to safeguard their online presence.