Jarvee is a very efficient tool to automate work with social networks. In this article, I will review the tool and tell you how to use it with Twitter.
What is Jarvee?
Jarvee is a social media tool to automate routine work with social networks. You are able to use it with almost any well-known networks including Instagram, Twitter, Facebook, Google+, Tumblr, etc. The developers claim that you can grow your account 10 times faster. However, there are a lot of aspects influencing this statement including how correct the strategy you select is, how you configure the application, and many more.
However, you can do a lot of things with your Twitter account automatically. The list of features includes posts schedule, automated followers and likes, and even the ability to send direct messages. Unlike many competitors, Jarvee provides a free trial period of 5 days so you will be able to test all its features without any limits and then decide whether you would like to subscribe. In order to be successful and work efficiently, the application needs to run constantly on your Windows PC.
Jarvee Features
Post Scheduling. The application provides the ability to create a schedule to share posts. However, this is not a unique feature because almost any Twitter application offers something similar.
Twitter Mentions. You can select a list of users you consider your target audience and mention them in your publications. Keep in mind that not everyone will like to be mentioned in your posts.
Auto-Following. Using hashtags, mentions, and keywords, create a list of potential followers and follow them automatically. If your account is really good, they will be able to follow you in return.
Auto-Unfollowing. When a user did not follow you in return, Jarvee can unfollow them automatically. You also are able to configure the time period after which they will be unfollowed.
Auto-Followback. You are able to automatically follow the users who followed your account.
Auto-Retweets. This feature looks for relevant content related to your niche and retweets it on your page. This allows for your page to remain page active and be interesting for your followers.
Auto-Hashtagging. You can add a keyword you would like to convert into a hashtag. The app will create the hashtags automatically so, you will not miss anything and will be able to make the posting really efficient.
Auto-Favorites. Jarvee will automatically like a tweet that mentions your account.
RSS Tweeting. You can add the RSS feed as a source for new tweets. The application will take the material from this feed and post it on your page. Completely automatically! However, this feature is also not that unique as it is quite common for similar apps.
Result Monitoring. This feature provides all the necessary tools to monitor the results of your Twitter campaign. At the same time, all other similar apps have a similar feature.
Spin Syntax. This allows sharing the same post many times with different words. By doing so, it will not look like spam.
Proxy Support. The proxy server will let you change the IP address to use several accounts or allows posting more publications without being banned.
Targeted Direct Messages. You are able to perform hashtag or keyword searches and send direct messages to any user.
Canned Replies. This feature enables the sending of an automatic reply when someone mentions you or sends a direct message.
Night Mode. You can set up the working hours in order to ensure the account is operated by a human and not by software.
Jarvee Pricing
Jarvee is free for everyone during the first 5 days. After this period, you will have to buy a subscription plan. There are 3 plans available: Starter, Professional, and Premium. They cost $19.95, $49.95, and $69.95 per month respectively. The only difference between these pricing plans is the number of manageable accounts. For example, the minimal plan supports 10 accounts, regardless of what social networks you are going to use.
How to Use Jarvee
Let’s suppose you need to publish about 20 publications per day. Preparing a good tweet may require significant time to find the information, extract some interesting sentences, think over the hashtags, add mentioned users, etc. Let’s see how you can automate the process with Jarvee. First of all, remember that it must not be your own content. Just find a reliable source and share the post. It will look really expert. Second, you will not have to spend a lot of time planning your posts as you can schedule them weeks in advance.
Step 1. Download and install Jarvee on your computer
To start, go to the official website, click on the Get Started link, select the pricing plan you want, and click Start Free Trial. After that, enter your email, download the installation file, and install the application. Log in to the application using your email and the password you got on your email.
Step 2. Create a marketing campaign
Make sure that you post your blog content on your Twitter page. This will help to promote your blog and improve the SEO ranking. To automatically share a blog post on Twitter, you are able to add the RSS feed to the campaign.
Add the Twitter account to Jarvee. Go to Social Profiles — Add Profile — Twitter.
Add the Twitter account to a Destination List. Open Destination Lists — Add — name the list — add the previously added account.
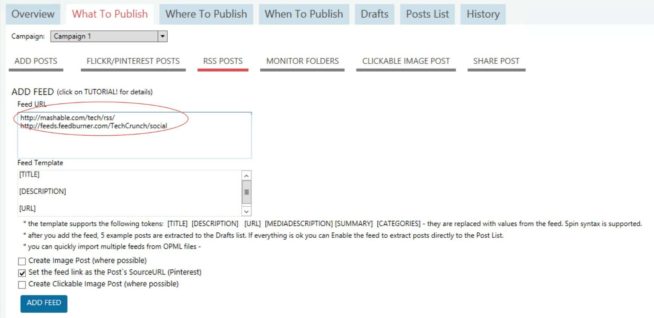
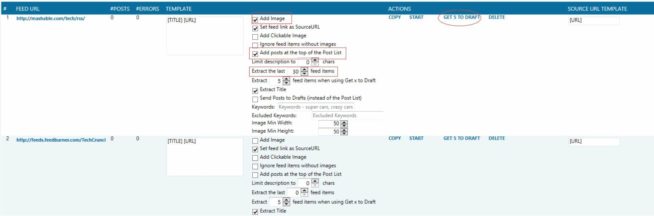
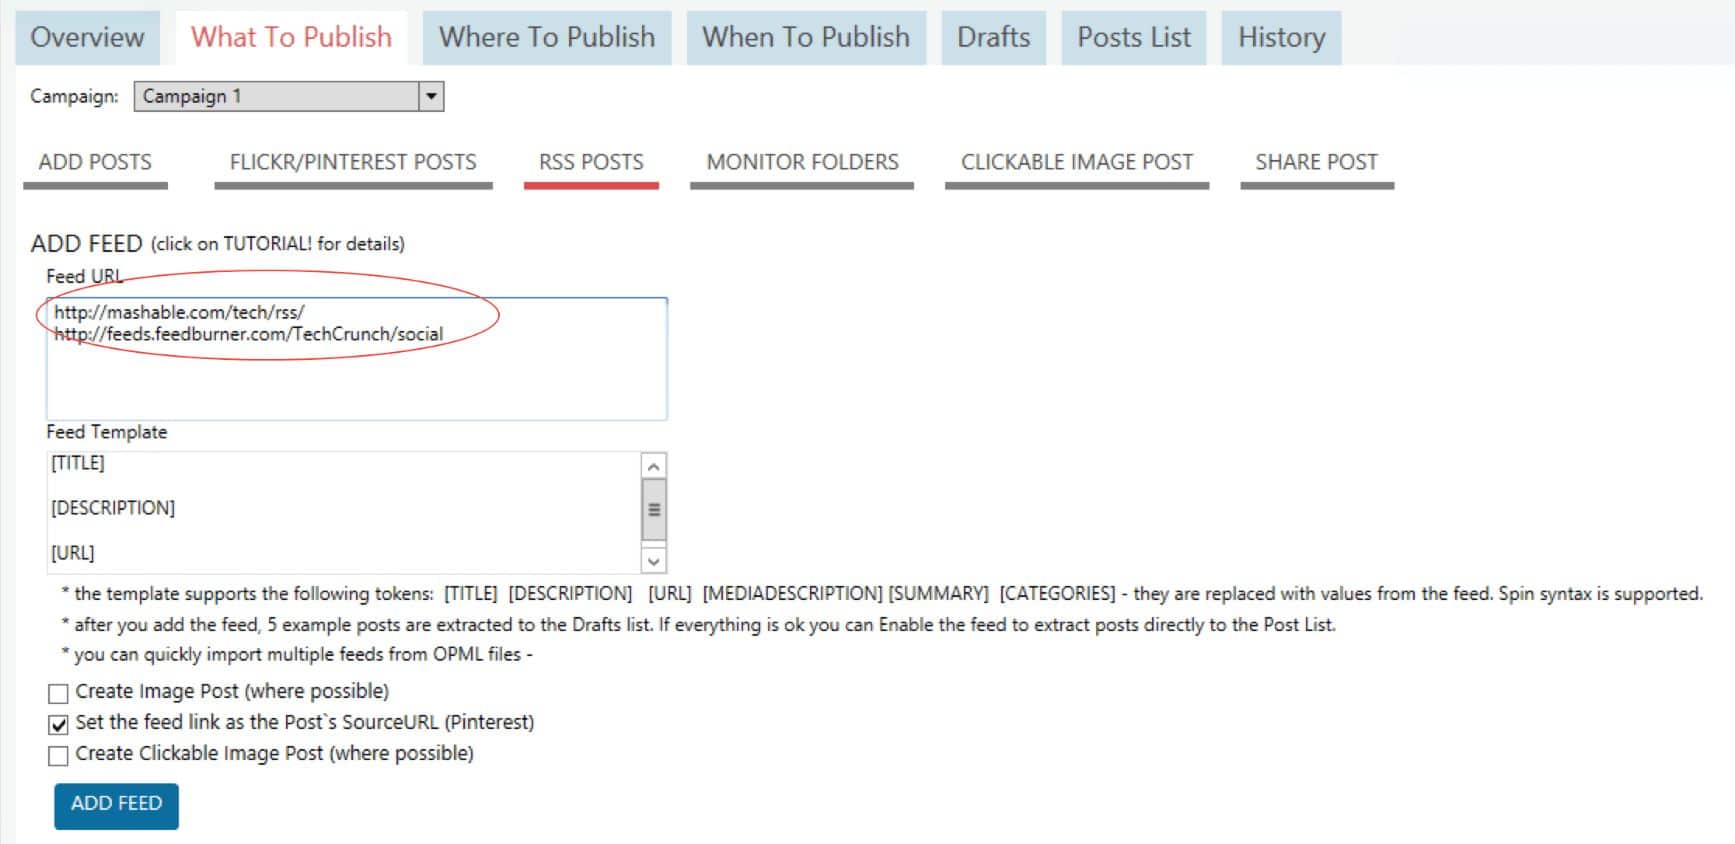
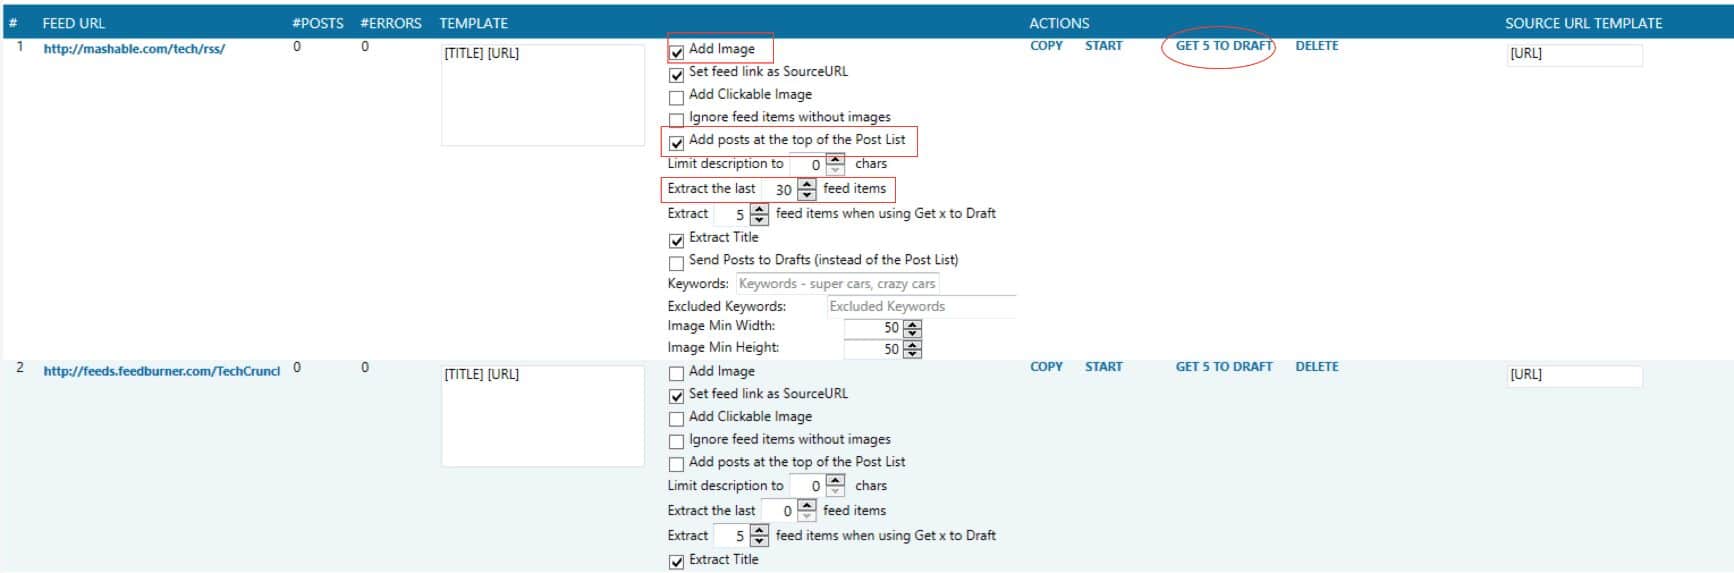
Create a Standard Campaign. Go to Campaigns — Add Campaign — Add Standard Campaign. Add content to the campaign. Open the created campaign — What To Publish — add feed URL. Then, create a post template like [TITLE] [URL].Also, add several hashtags: [TITLE] [URL] #jarvee #socialmedia. Make sure you keep these short. You may also check “Create Image Post (where possible)” to extract images from the publication. When you are done, click ADD FEED.
Add the destination list. Go to Where To Publish tab and choose the created list.
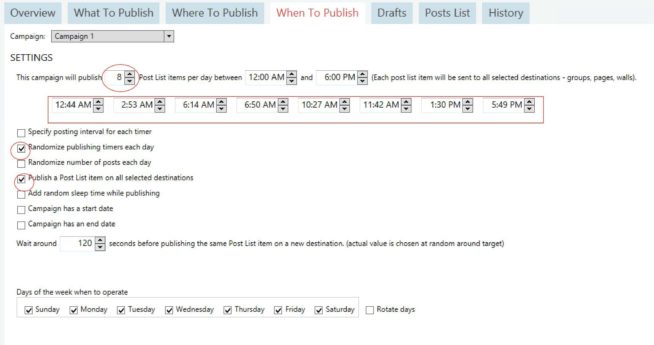
Set up the time of the posts. Open the When To Publish tab and select the time interval for your Twitter publications.
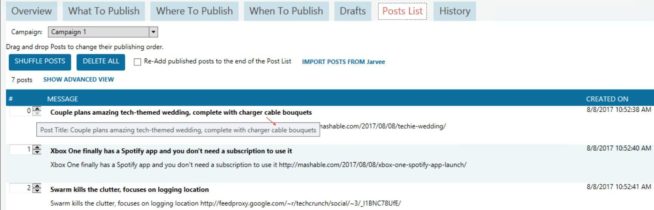
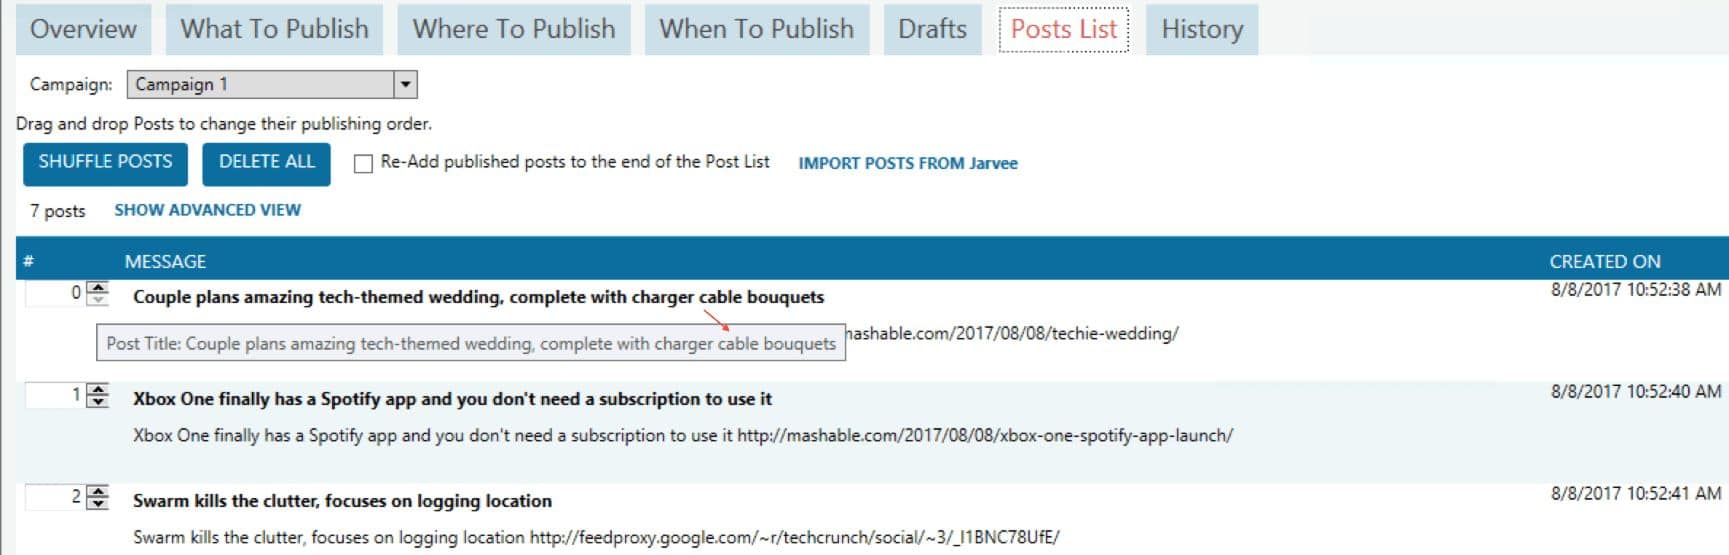
Review the posts. Open the Posts List tab to preview the extracted posts. If all is good, check Re-add published posts to the end of the Posts List box.
Launch the campaign. If you configured everything correctly, click the Start Campaign button and enjoy the results.
Pros and Cons
Pros
A lot of advanced features to promote your Twitter account, including automatic, follow and unfollow, likes, comments, retweets, and direct messages.
The application allows any user to automate Twitter promotion and achieve the highest results. At the same time, it will save a lot of time and effort.
Supports all the popular social networks: Facebook, Instagram, Twitter, Google Plus, YouTube, LinkedIn, Pinterest, and Quora.
Detailed customization of time intervals and working periods to ensure the account is managed by a human. As a result, your account will not be banned.
The ability to run the application in the background and even in sleep mode.
5 days free trial and reasonable prices. The price differences come only from the number of manageable accounts.
Cons
Supports only Windows computers. However, you can run it on other operating systems using a virtual machine.
The application has to run 24 hours a day.
Conclusion
Jarvee is a very efficient tool to automate the promotion of your social network accounts. It is very easy to use and highly customizable. You can even test the app for free during the first 5 days. I definitely advise using this software.
Marcus is a cybersecurity analyst with a focus on VPN and proxy services. As the founder and driving force behind a prominent VPN and proxy website, Private Proxy Guide, Marcus has emerged as a trusted authority in the digital realm. With a passion for staying ahead of evolving cyber threats, he has played a pivotal role in educating and empowering individuals and businesses to safeguard their online presence.