Installing a new external hard drive will let you expand your storage and gain more space for important files. Most often, people install external hard drives without any issues and they’re accessible right off the bat. However, in many cases, Windows can detect the hard disk but prevents your access.
In this case, when you double-click on the drive to access it, you’ll be looking at an error message that says that the drive isn’t accessible with another message “A device which does not exist was specified.“ So how do you fix this issue? Well, I have a couple of solutions to this problem.
1. How to Fix “A Device Which Does Not Exist Was Specified?“
Here are a few possible solutions to this problem on Windows 10 and 11.
1.1 Make Sure You’re Permitted to Access the Hard Disk
Windows can often display the “A device which does not exist was specified“ error if you don’t have permission to access the external hard drive. Despite you being logged in as an administrator, the issue might persist, so here’s how to make sure you actually have full permission to access it.
Open Windows Explorer by pressing Windows + E on your keyboard.
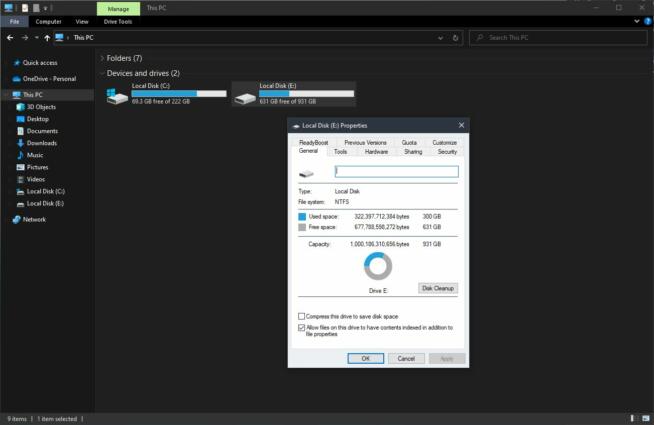
Find your hard drive, right-click on it, and choose Properties.
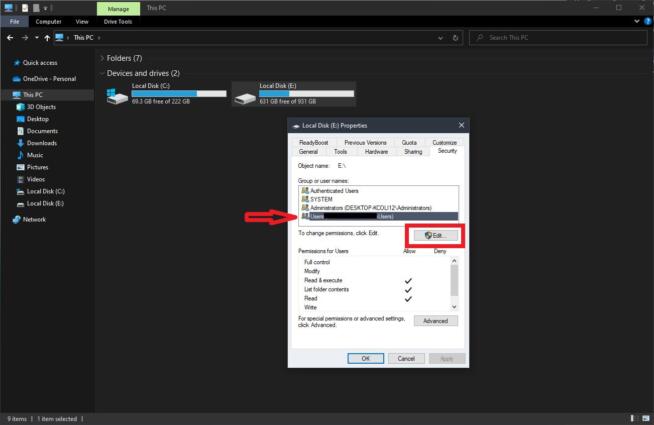
Click on the Security tab and select “Edit…“
On the list, you’ll most likely find 4 accounts, but click on the one with your name. It should be the last one on the list.
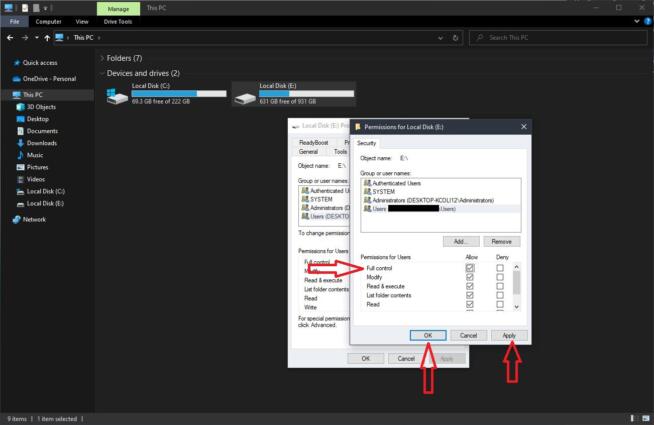
Under “Permissions for authenticated users“ make sure you tick the box next to “Full control.“
Click on Apply, click on OK, and close the window.
Try double-clicking on your external hard drive again and see if it works properly.
1.2 Plug Your Hard Disk into Another USB Port
Your motherboard or PC case might have a defective USB port that isn’t working as it should. Thus, it can detect a newly-installed external hard drive, but it won’t give you access. You can try to fix “A device which does not exist was specified“ by plugging it into another USB port.
Experiment with all USB ports you have and don’t be afraid of trying USB 3.0 ports if you have them. Also, when plugging in another USB port, you can try restarting your computer to see if the external hard drive works. If not, move on to the next step.
1.3 Change Your Drive Name
Changing your drive name seems to fix the issue of “A device which does not exist was specified.“ When this error message appears, the drive name (letter) sometimes isn’t matching the name of the drive you can see in the Disk Management menu.
Here’s how to change the drive letter to hopefully fix the problem.
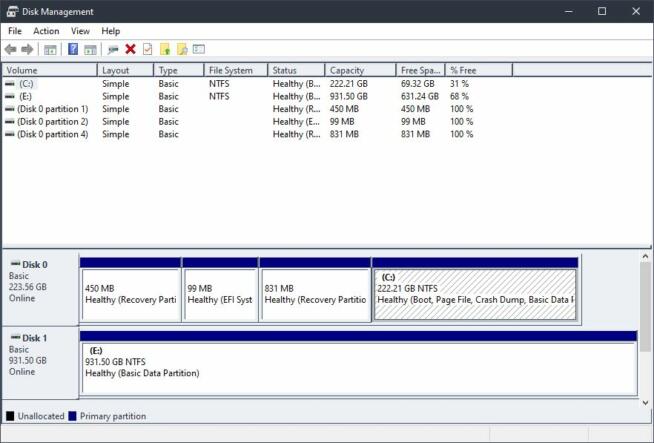
Click on the Windows button, type in “Disk Management,“ and press Enter.
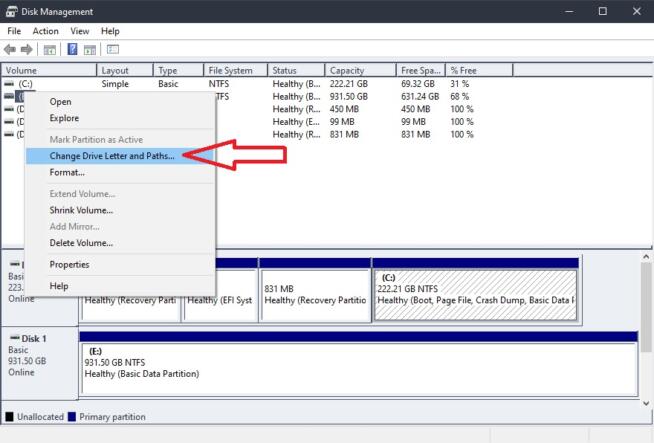
Find your hard drive letter, right-click on it, and select the option that says “Change Drive Letter and Paths…“
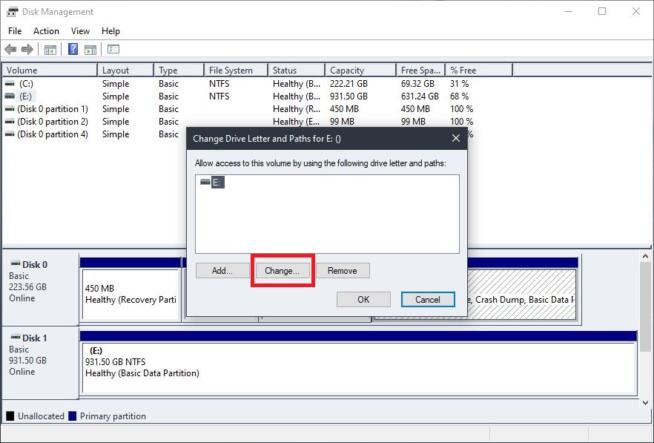
When the new window opens, click on Change.
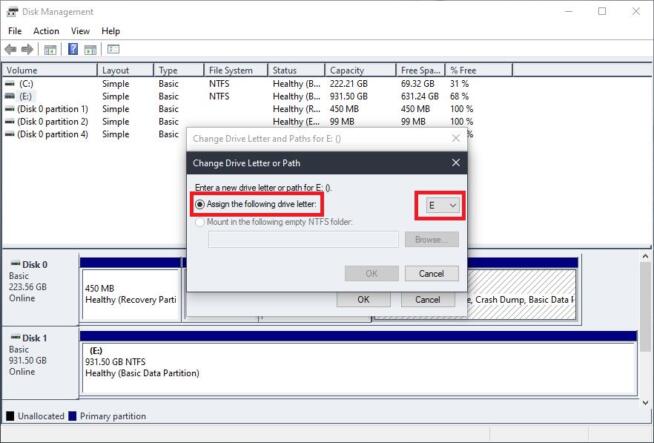
Tick the circle next to “Assign the following drive letter:“
From the drop-down menu on the right, select the letter of the drive that isn’t in use. If you use C and D, for example, you can choose G, A, B, or any other letter.
Click on OK.
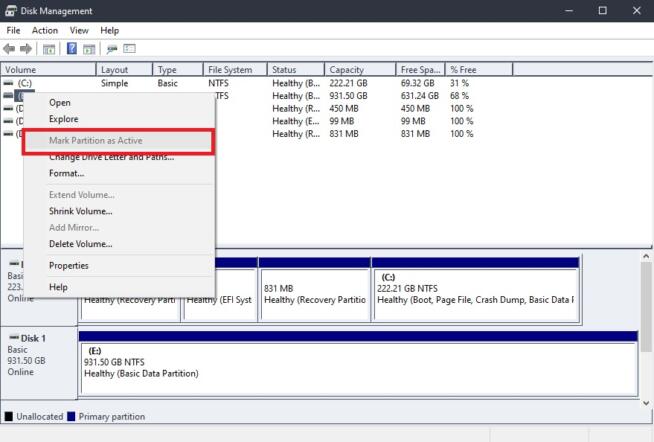
Back in the Disk Management menu, you can right-click on the external drive and select “Mark Partition as Active“ if you have this option.
Close Disk Management and try accessing your drive again. It should work now.
1.4 Uninstall the Device
If you still can’t fix “A device which does not exist was specified”, try uninstalling the device and then plugging it in again. Here’s how to do it.
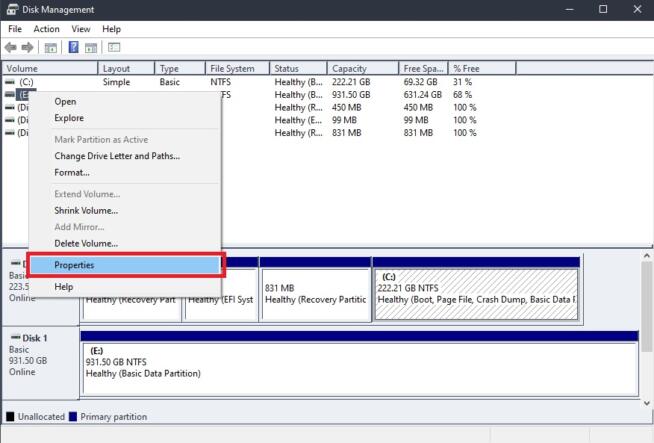
Open Disk Management by typing in “Disk Management“ in the Start menu and pressing Enter.
Right-click on your external hard drive and select Properties.
In the new menu that opens, click on the Hardware tab.
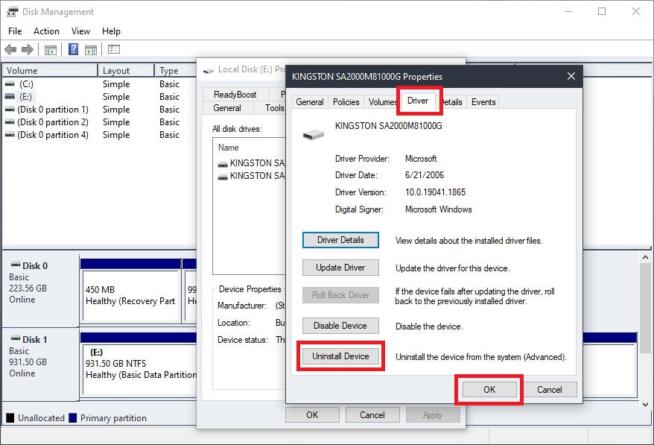
Here, select your drive again and press Properties.
Click on the Driver tab and press “Uninstall Device.“
Follow the steps on the screen to remove it, and after it’s done, click on OK.
Close Device Management and restart your computer.
Plug your external hard drive again and check if it works.
1.5 Update Your BIOS
Lastly, if you still see this “A device which does not exist was specified“ error, it could be that your motherboard’s BIOS isn’t up to date. Having an up-to-date BIOS is important for getting the newest features and improvements.
Let’s see how to update your BIOS.
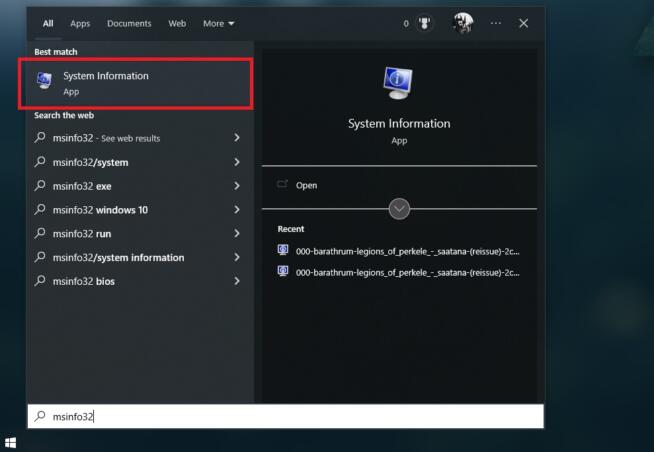
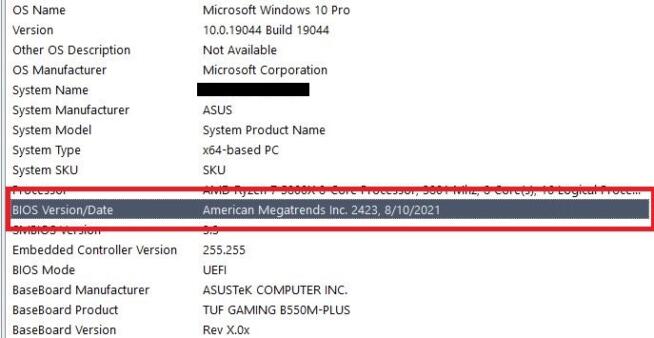
First, check your BIOS version by pressing Windows + R, typing in “msinfo32“, and pressing Enter.
Under the “System Summary“ menu, find the entry named “BIOS Version/Date.“
Go to your motherboard manufacturer’s site and check which is the latest BIOS version.
If you don’t have the latest version, download the BIOS file to your computer from the manufacturer’s site.
Copy and paste the BIOS update file to your USB flash drive.
Restart the PC and enter the BIOS menu to perform an update. You should find the instructions for that process on the website of your motherboard manufacturer (Asus, MSI, AsRock, …).
With that said, I hope I managed to help you fix the “A device which does not exist was specified“ and that you can now use your external drive properly. Which solution worked for you? Tell me in the comments section below.
Marcus is a cybersecurity analyst with a focus on VPN and proxy services. As the founder and driving force behind a prominent VPN and proxy website, Private Proxy Guide, Marcus has emerged as a trusted authority in the digital realm. With a passion for staying ahead of evolving cyber threats, he has played a pivotal role in educating and empowering individuals and businesses to safeguard their online presence.